Showing posts with label Quilt. Show all posts

Wednesday, 19 June 2013

Thank Kaffe Fassett for That!

I've finished my Kaffe Fassett quilt at long last. Looking back I actually started this quilt in January so it's safe to say it has taken me a bit longer than I'd anticipated. In my defence it's the biggest quilt I've made and I tried free motion quilting for the first time. See two very good excuses right there!


As the fabrics were so fussy I decided that I wanted to keep the blocks as simple as possible. Squares only. The finished squares measure 3.5 inches, I cut the fabric into 4'' strips at first and went from there. Sewing the various fabric strips together, then cutting down the blocks to size (across several strips) really saves time and I think gives squarer squares (ha!).

 
The fabrics on the quilt top are all Kaffe Fassett. I really could not resist these fabrics, I just love the bright colours and floral designs. I started out with all pinks and reds but did add a bit of green in as well to give the eye somewhere to rest! I think I only used about 10 green blocks across the whole quilt, but it just breaks it up a little.

 
It also meant that the quilt back really did have to be lime green (that's what I'm telling myself anyway). I went for an extra wide fabric by Moda. It was a godsend because even though the finished quilt is 50'' x 60'' I didn't have to piece the back. That always strikes me as a chore too far!
 
 
Baggy basting aside (not a euphemism!) I'm really happy with the quilt back. I'm defo a fan of free motion quilting and will be trying it again on another quilt. I don't know if I'm controlled enough to do anything very complicated but I think I'd be happy to try 'stippling' next time. I used the patchwork blocks on the quilt front as a guide to positioning the flowers. Each of the flowers is centrally located within a square block.
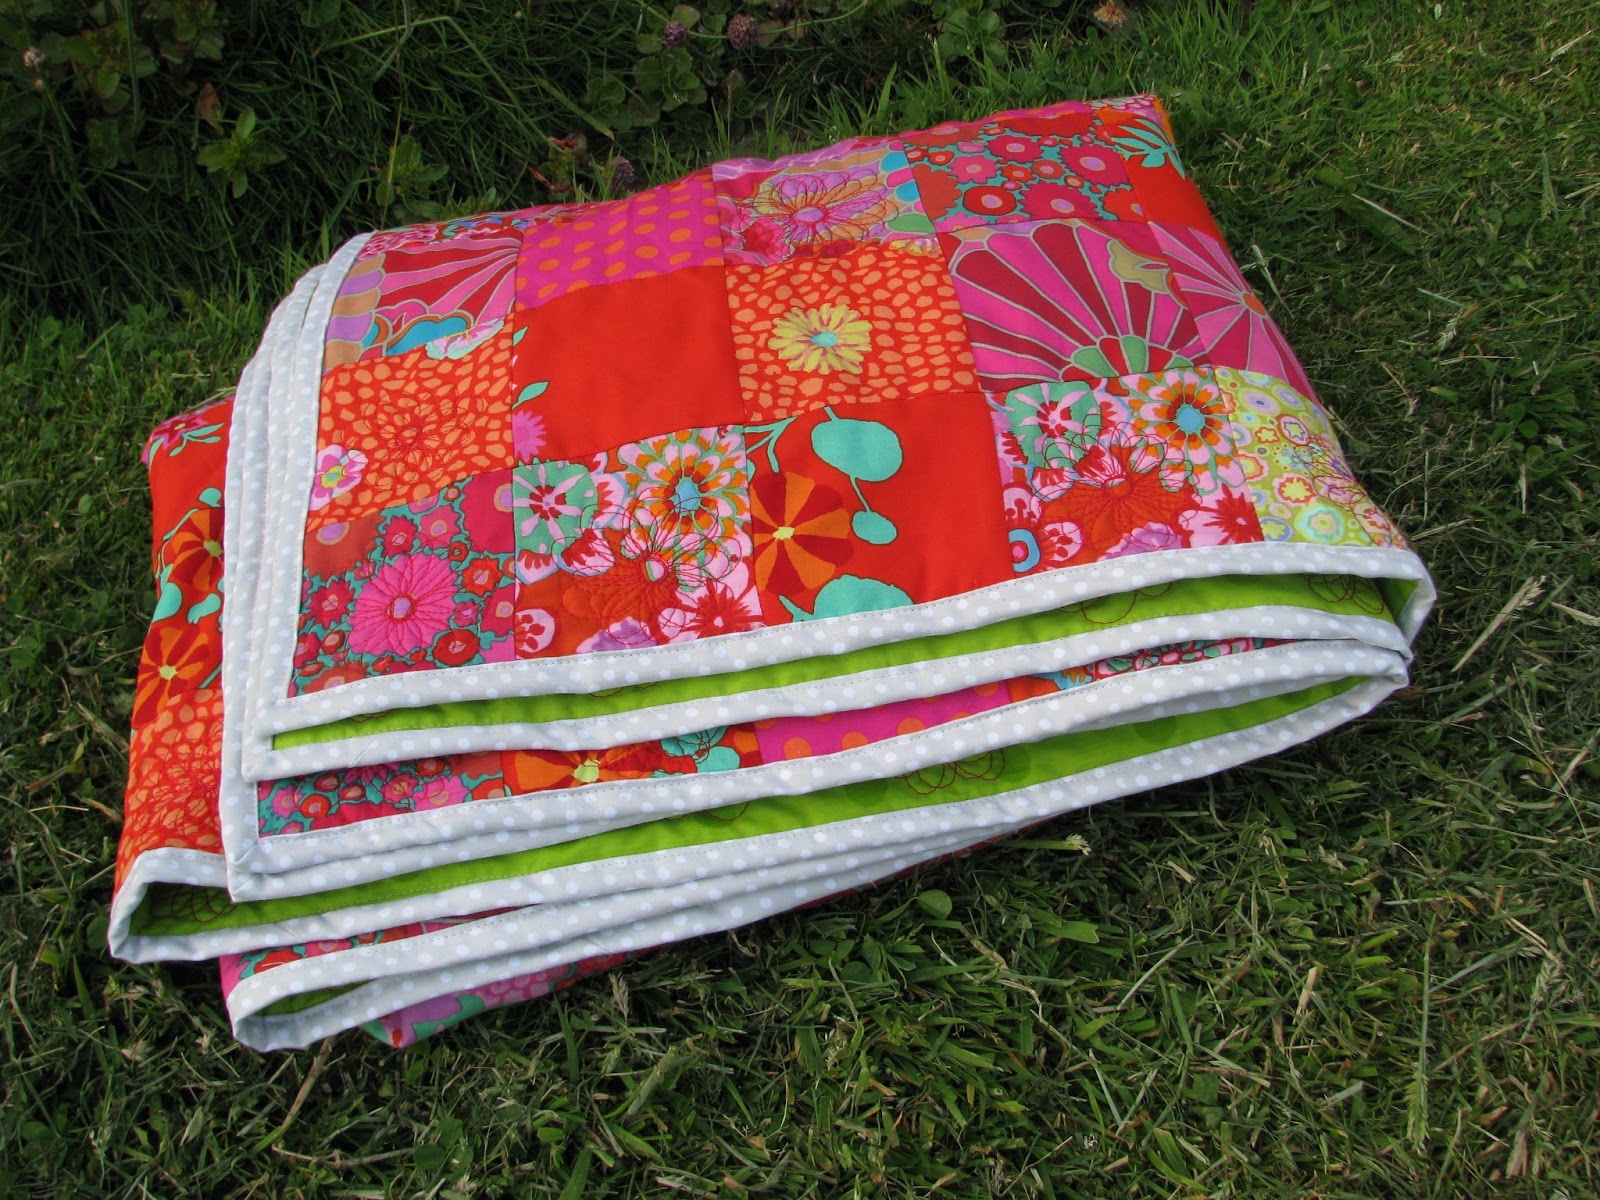


I'm loving the light grey colour of the binding fabric. It adds a subtle border to the quilt and somehow manages to tie in the slightly random colourway of the top/back. I've never seen a fabric quite this shade before but it's really lovely, I imagine I'll be using it again as a binding fabric.
 
 
These photos were taken in front of our house, safe to say the neighbours thought we'd lost the plot completely at this point! So nice to get photos in good light and weather though.


Now it's the tricky business of deciding what to work on next, whilst snuggling under my new quilt. The hardship!
 
 
 I'm linking up to Finish it up Friday. If you've popped over I'd love to hear from you. Are you a fan of the bright colours? What shall I make next?!


Thursday, 13 June 2013

Wonderful Window

I've finally had my two stained glass panels fitted into my lounge window. It is so nice to finally see them with the light shining through after they've been laying flat for so long. My friend Nigel fitted them for me whilst I was at work so it was a lovely surprise to come home to.

Quilt inspired stained glass

Doesn't the glass just shine?

Stained Glass Window

I did the larger window first and was inspired by a quilting design I saw online - I dance in circles by Traceyjay Quilts. It consists of very regularly spaced squares, with irregular spaced circles, easily achievable in glass. I measured up the space for the window and drew the outline of the window and all the regularly spaced squares in Adobe Illustrator. That way I could be sure the window would fit. After I'd printed the window I drew the circles freehand to get that irregular look, which I'd struggle to achieve on a computer.

Stained Glass Window

The second panel was a bit of an afterthought and I basically just made it up as I went along! As I knew it was sitting beneath the first panel I kept the square motif running through, but then just adjusted the design until I was happy with it. I added in a few additional glass colours too, which in hindsight might have been an error as the two panels don't quite match. Oops.

Stained Glass Window

I really prefer my first window but the lovely Tim prefers the second. What do you think?


Love that glass - so pretty.

Tuesday, 11 June 2013

A Grey Day

You are not going to believe the colour of the fabric I bought today. Grey!

Dear Stella Design #37

Don't worry though, my love of bright colours hasn't left me. It's just that I'm nearly ready to start binding for my lovely bright pink, red and lime green quilt (I'd be doing it now if I hadn't totally run out of thread!). I was originally looking for a black and white striped fabric but then this polka dot caught my eye. I think the grey is a particularly lovely shade and will really help create a frame for the quilt. The fabric is by Dear Stella Design #37. I bought it from The Viking Loom in York. I just wish I'd bought some cotton at the same time.


Oh dear, no more sewing for me this evening.

Thursday, 16 May 2013

Sam's Quilt

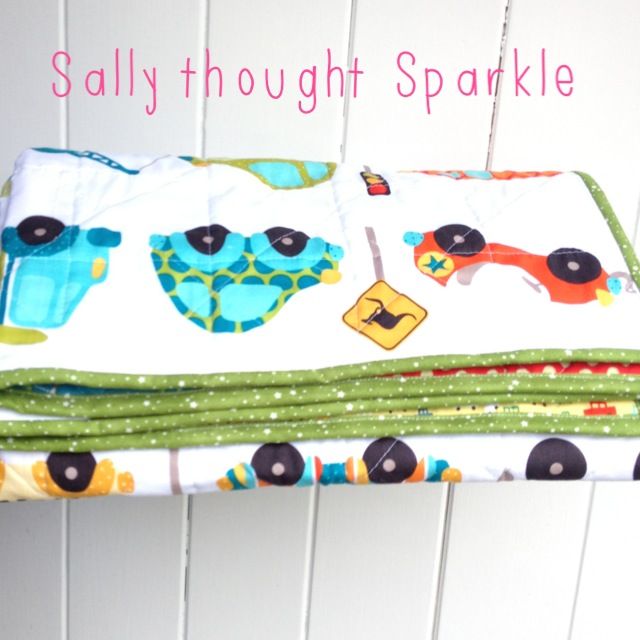
Happy first birthday Sam! The birthday boy has received his birthday quilt which means I can share the finished article with you all. It's a good job he's into colour as this quilt has turned out a bit on the bright side! Primary colours, what was I thinking?! Oh who am I trying to kid - I love garish. Fortunately, it's a hit with a one year old - his Mum says that he enjoys pointing at the patterns. How cute is that?

Star Block Quilt Retro Rocket Rascals

I decided to go for the star block design by Cluck Cluck Sew. I've made this design once before for my Stars and Scraps Quilt, but I thought the stars would work well with the sputnik fabric (continuing the spacey theme, see what I did there). If you want to know more about the fabrics used for the quilt top, see my last post. It's the back of the quilt that I'm uber-excited about though - it's quite possibly the cutest quilt back ever.

Riley Blake Designs Peak Hour Kellie Wulfsohn Quilt

I know, just how good is that? I could swoon over that fabric all day. It's Riley Blake Designs DC2836, Peak Hour by Kellie Wulfsohn for Don't Look Now. I bought it at The Viking Loom in York if you're in the area and desperate to get your hands on some! I had planned to go for something quite plain as the backing but as soon as I saw this I knew it would be perfect. I really like how it features a small amount of each of the colours from the quilt top, so ties in perfectly.

Star Block Quilt Retro Rocket Rascals

The binding was actually some leftover from my Emma's Christmas Stocking. It was just the perfect shade of green and has little stars all over. The quilting was simply stitched in the ditch and I also quilted some diagonals to add a bit more interest.

Sally thought Sparkle Quilt

I'm so happy with this quilt. If you're visiting over from Crazy Mom Quilts, finish it up Friday please comment below, I'd love to hear what you think.


Sunday, 10 February 2013

Feeling a Bit Green Patchwork Quilt

My lovely Patchwork Quilt is starting to come together. The original fabrics I bought were all reds and pinks, but as I was starting to put them together I became a bit concerned that there just wasn't anything to make the colours really zing. Here are the fabrics sewn into strips, do you see what I mean?


I decided to add one extra fabric in a vastly contrasting colour - lime green - to make the quilt top pop. I settled on another Kaffe Fassett fabric called Paperweight. I'll definitely be using it sparingly as it's a touch garish! I do love the glass paperweight effect though.

 
So far I've made 5 blocks consisting of 25 three and a half inch squares. Each of the blocks has a maximum of one green square, some have none. Here are four of the finished blocks laid out  - what do you think to the green fabric addition?
 
 
I am trying to be extra careful sewing these blocks together, keeping the seems as straight as possible, because it really shows if they are offline. Although the blocks come together quickly, I've still got a large pile of strips to sew together into blocks. I want the final quilt to be large enough for my double bed (too big!).
 
Hope you all like it.

Monday, 28 January 2013

Sewing Strips

I've been really busy with the sewing machine creating a massive pile of paired strips of fabric. Oh I have so much still to do!

Tuesday, 15 January 2013

Sewing Machine Cover

I have finished my sewing machine cover and it looks so pretty! I used all of the Oh Deer! layer cake I'd received as a Christmas present.


I made up the design as I went along. First I sewed the squares into pairs, then cut them in half to make rectangles. By sheer luck four rectangles was the same width as my machine, so it was just a matter of adding more rows. I created a large rectangle -  large enough to wrap right around the sewing machine, with a notch for the handle. Here  it is unwrapped, measuring approximately 40cm x 100cm.


The backing fabric is one I bought a while ago, it's a beautiful green - but I can't remember the brand! The binding is a red and white spot, leftover from Emma's cot quilt.


The ties are just a lovely green ribbon to hold it together at the top which I sewed to the quilted cover. Ta dah!


Saturday, 12 January 2013

My Sister Came to Visit

My younger sister Anna came to visit me in York today, we had a lovely day of crafting activities. She has finished her first ever quilt top and needed a bit of help choosing some backing fabrics and binding. I'm always happy to do a bit of fabric shopping so we ended up going to every fabric shop in York. Viking Loom, Gillies Fabrics, Grace and Jacob and Fletchers Fabrics - Phew! We got the binding from Grace and Jacob and a lovely spotty backing fabric (extra wide at 140cm) and batting from Fletchers Fabrics.


As she has never basted a quilt before, we also did that together. My goodness, it is so much easier with two people helping. Anna did manage to safety pin her quilt to my lounge carpet a few times, but otherwise it was plain sailing!


She even got to start the machine quilting. She's just stitching in the ditch at the moment, but plans to do some infilling. Keep your eyes peeled over at my sister's blog, Minnie Loves, for the finished product. I'm so excited to see it.

Friday, 4 January 2013

Yippee I've Finished a Quilt!

Emma's quilt was finished (just!) before Christmas, but as it was a present I couldn’t do the grand reveal on the blog until after she’d unwrapped it again. I realise that it's unlikely that a 7 month old is reading my blog, but you can never be too careful.


It was Emma's first Christmas so I wanted to give her something special that she could keep. I think she liked it, actually her favourite bit was when I wafted her with it (we're odd). Here she is snuggling - what a cutie. 
 

I’d shown you the initial quilting before when I’d first decided to go for a zig-zag but before I'd infilled. Oh why did I ever think that the ziz-zag was a good idea? It pushed Mum’s old Frister Rossman and my sanity to the limits. As soon as I turned any corners, the thread would start looping at the back. So annoying. It was worth the challenge though because the quilting really adds to the impact of the design, bringing out the chevrons.


Here's the quilt from the back. I am in love with the gorgeous backing fabric and binding.

 
I hope it will bring Emma many years of cuddles and warmth.

Wednesday, 12 December 2012

Getting Quilty!

I have made a start on quilting Emma's Cot Quilt. I decided to quilt the chevrons to start, but wasn't sure what to do next - I originally thought I'd stitch in all the ditches. Then I thought to myself, why not sew an extra line offset from the first? That's where I'm at now.


I really like how it's looking. I haven't finished though. My plan now is to keep sewing offset lines, but only on the lighter coloured chevrons. That way the brighter chevrons should stick out (as they aren't quilted) from the lighter chevrons (which are).

That's the plan!

Sunday, 2 December 2012

Tim and Sally's Christmas Stockings

It is officially December now so the tree is up and it's time to enjoy an advocaat (it's a family tradition!). Woo.

 
I can also reveal my latest Christmas Stockings. OOOOooh! I sewed both of these in an evening. I couldn't bring myself to cut up the Winter Wonderland fabric so I simply quilted the fronts in a criss-cross pattern using the fab Christmas Cotton. I think the cotton and fabric go perfectly together. It's the first time I've used a stripy cotton and I really like the effect here. What do you think?
 
 
How cute it that deer?
 
Then it was simply as case of sewing everything together, the linings are made from the fabric I bought at the Knitting and Stitching Show. I cut the linings a bit longer than the fronts so that I could create a nice cuff. Tim's has the grey cuff, mine is the red.


Here they are pinned up on the fireplace awaiting Father Christmas' visit!


Thursday, 29 November 2012

Fabric Fantastic

I've been shopping again today. I went to Grace and Jacob in my lunch break to find some fabrics to finish off Emma's Cot Quilt. I really love their collection of fabrics - they don't have loads and loads in store, but everything they do have is absoloutely beautiful.

For the backing of the quilt I have chosen a lovely blue floral print, it really ties in with the fabrics on the front, but the pattern is slightly larger-scale.


The fabric from the Delilah Collection by Tanya Whelan Grand Revival for Free Spirit TW42 Bijou.

I then went a little mad and bought this really bright red spotty fabric for the binding. I think (hope!) it will really set off the other prints.


That's the shopping done for now!

Tuesday, 27 November 2012

Emma's Cot Quilt

I have finished sewing together the top of Emma's Cot Quilt. I am so happy to finally be making some progress with this quilt, it seems like I've been working on everything else but this recently. I love the chevrons, I will defo be making this pattern again. Spot the deliberate mistake in the top left corner. I spent FOREVER sewing and resewing all the pieces so no two fabric patterns were together (or so I thought!). I didn't notice the error until after I'd sewn the whole quilt top. It actually made me laugh out loud because I've been so particular about it. I've decided to live with it (and Emma won't notice!).

 
Here's a close up. Look at the points of those triangles, what a relief!
 
 
This last one boggles the eye.


I'll be hitting the fabric shops of York tomorrow for the backing and binding! Yippee!

Sunday, 18 November 2012

Half Square Triangle Layouts

I've finally finished trimming my half square triangles (hst), so I'm ready to start sewing them together. Yay! I've spent most of this afternoon trying a few different layouts in my design space (aka the lounge floor). Each hst is made up of one 'dark' and one 'light' fabric, unfortunately I think my fabric choices were a bit too similar so it lacks a bit of contrast! When I started these blocks I had in mind that I'd do chevrons. First I tried keeping the chevrons the same fabric right across the quilt. It looks quite nice in this photo, but just didn't really work in real life. Too bold.


Then I tried pairing the 'dark' fabrics, so the blues together, the pinks together, the greens together. This didn't work as I didn't have a pair for all the fabrics. Hmm.


I then gave up on the hst idea and tried pinwheels. I wasn't happy with this either. It looks too confused, again because the contrast between the 'dark' and 'light' fabrics isn't bold enough.

 
I then had one more go with the chevrons, using a random layout of all the 'darks' and all the 'lights' for each chevron. I think I'm happiest with this pattern, what do you think?
 
 
I think I've learnt a lesson here from this quilt - contrast, contrast, contrast! I'm not giving up though, I will carefully choose a binding fabric and hopefully that will make the colours in the final quilt really pop.